Building a Custom Interior for a 32' Doug Wright
When Daryll Zeiser was 18, he lived in California and began a career in construction, which he loved. The idea of working outside and working on tangible stuff with his hands was very appealing. So, in a chance turn of events, Daryll ended up back in his hometown of Long Island, NY and looking for a job in construction. While he intended to get back into construction, he took a job with his step Dad, who owned Don Frost interiors. Daryll was mentored by Don, and over time, the company evolved from furniture and auto upholstery to more custom work, including boats. By this time Daryll loved the trade and the boats really peaked his interest due to the level of customization that went into the interiors. Don and Daryll worked closely together.
Unfortunately, years later, Don passed away from cancer. Daryll continued the operation with Don’s wife, as Don wished, but in 2010, Don’s wife closed the shop after losing interest. This presented a great opportunity for Daryll, and Unique Upholstery was born. In this article, Daryll walks us through the custom interior of a customers new 32’ Doug Wright boat.
The customizations were challenging as many details had to be taken care of, but the craftsmanship and quality really standout. In this case, existing injection molded seat shells were modified to customer specs; the arms were cut down to enable the driver to reach the throttles. A custom console was made, headrests in the backseat, and custom side panels were made to finish it off. Daryll loves the challenge of custom work like this, and usually can custom create something in around 4 weeks. He does OE and custom jobs of all sizes.
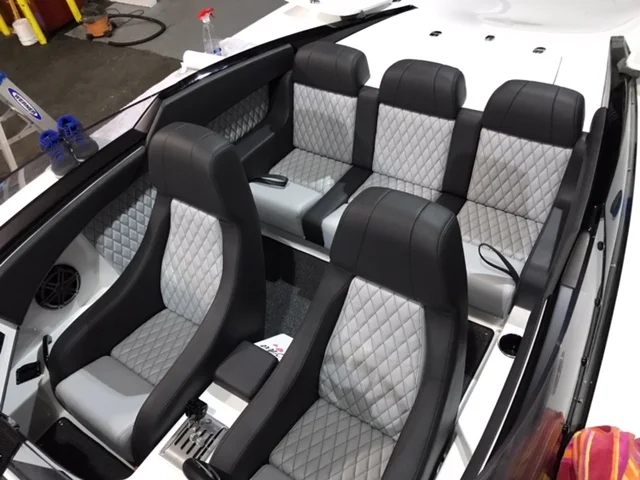
Daryll started with the front seats, the customer had picked the colors and wanted diamond pattern stitching. From Daryll “Doing diamond stitching is a long process. You have to draw up a template. Draw all the lines on the vinyl. Then sew all those lines on 1/2" sewing foam. Sewing on the 1/2" foam gives the diamonds the raised look.”

Diamond
The diamond stitching takes time, but looks amazing, and really adds texture to the design.
Daryll: “Next, I moved on to the back seat. He wanted the look of a 3-man bench. So we put dividers between each insert. The dividers would be level with the inserts so you could lay flat on the bench without any obstruction. Next would be the backseat headrests. Here we had the headrests sit on the rear deck. The issue here was the deck had about a 3/4' concave at the middle. The customer wanted the headrests to look as if they were straight across. So we had to do some wedge work in the foam to get that look. Using a bandsaw, we had to cut a nice radius on the top front edge of the foam to match the front seat headrest.”

Next would be the armrests on the 2 ends of the seat. Normally its not a big deal, but the outside corners of the fiberglass had about a 5" radius. Usually, the inside and outside of the framing would be the same. Not here. Because of the radius, we had to do some crazy construction.

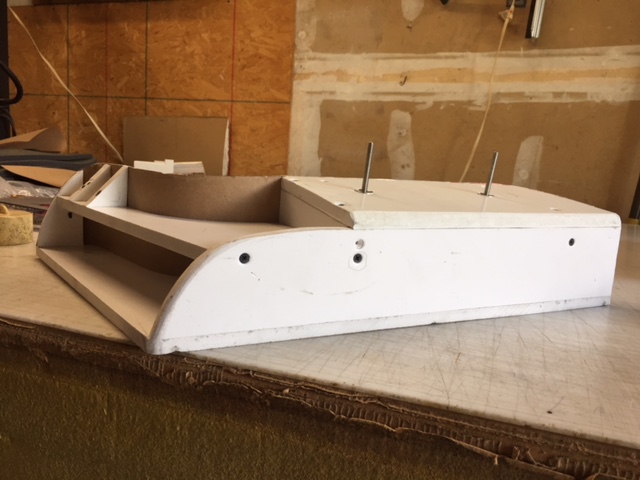
Custom armrest required cutting the frame to fit the boat.
Then we moved to the side panels. We had upper and lower panels here. The lower panels were a little under the top deck, with speakers holes cut in them.

Match
The design and material really bring this interior together, the custom side panels are a nice touch.
The upper panels had curves and compound curves. Using the foam board (instead of wood) for these side panels helped tremendously. Heating up the foam board and clamping, or screwing, them in place will give it the shape to follow the curves.
So In simple terms... first, make your templates. Second, cut your boards. (in my case, foam board) Third, do all your drilling for mounting foam board with stainless steel hardware. Fourth, do all your foam work. Fifth, after foam work, dry fit everything to make sure all fits well. Sixth, Draw up all your vinyl templates. Seventh, cut your vinyl. Eighth, sew all your vinyl. Last, but not least, fit everything with stainless steel staples.”

Rear
The custom rear bench is a nice design for passengers, and practicality. Individual seats as a bench.

Daryll at Unique Upholstery can be reached at: budzeiser@gmail.com
P: 631-627-1433